Want to learn how to add tags, attributes and categories to your WooCommerce products?
Tags, attributes and categories are necessary for a high converting WooCommerce store. By including these three elements in your product listings, you make it easier for visitors to find what they’re looking for and to attract more traffic from search engines.
In today’s article, I’ll show you exactly how to add tags, attributes and categories to WooCommerce so you can best describe what exactly it is you’re selling. But let’s first understand why we need these elements in the first place.
Why do we need to add categories, tags, attributes and to WooCommerce?
Adding appropriate tags, attributes and categories to WooCommerce can help drive more traffic to your ecommerce store, increase your sales, and improve your shoppers’ overall user experience in these ways.
Better site navigation and searchability
Product categories, tags and attributes are metadata elements that provide a structured way to navigate your site. They make it easy for shoppers to find what they’re looking for, either by scrolling through your pages or using the search function.
Convenient user experience
Related to our last point, when your online store is arranged into logical categories and products are given the right labels, customers can find products and complete purchases more efficiently. This enhances the overall user experience which can improve your customer satisfaction rates.
Search Engine Optimization
Properly organized product labels in WooCommerce can have a positive effect on your SEO. Google uses those elements to understand the content on your website, so optimizing them can lead to higher Google Search rankings.
Cross-selling and up-selling
Well categorized product labels allow you to set up cross sell and up sell products easily. For example, if you have a sports store with a “Men’s cycling wear” clothing line, you can display suggestions like matching cycling jerseys, helmets, and water bottles etc.
What’s the difference between categories, tags, attributes to WooCommerce?
You might confuse the differences between categories tags and attributes in woocommerce because these terms are often used inappropriately.
To help out, here’s what each term involves;
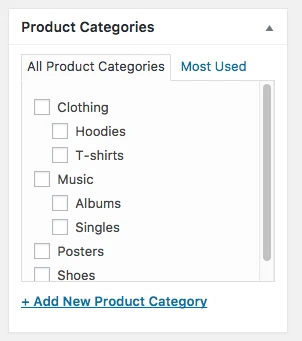
First, Categories in Woocommerce are the primary way to group products with similar features. If needed, you can also add subcategories like in the example below:
Second, WooCommerce Tags are another way to relate products to each other. But contrary to categories, there’s no hierarchy in tags so you can make subtags.
To give an example, imagine you sell streetwear and you have a lot of anime designs. You could make the tag “Anime” and add that tag to your store’s menu or sidebar so a searcher could easily find all shirts, pants, and garments with anime prints.
And third, Attributes are the most detailed way to group products. For WooCommerce stores, attributes come in handy in two situations. The first is via WooCommerce widgets, one of which is the “Filter Products By Attributes” widget which enables site visitors to select a specific attribute when looking for a product.
If you add this widget to your sidebar, customers will then be able to filter products based on attributes you set up such as its weight, color, material, size etc. The second scenario is with variable products.
To create a variable product, an attribute must first be defined for the product. These attributes can then be used to make a distinction between different variations. For instance, if you sell clothing, two natural attributes to create are size and color. In this example, customers will have an easier time finding items that fit size and preferences.
You should now understand how Categories, Tags and Attributes differ. Moving now, let’s see how you can add them to your WooCommerce products.
How to create product tags, attributes, categories, to WooCommerce?
Categories
To add WooCommerce categories:
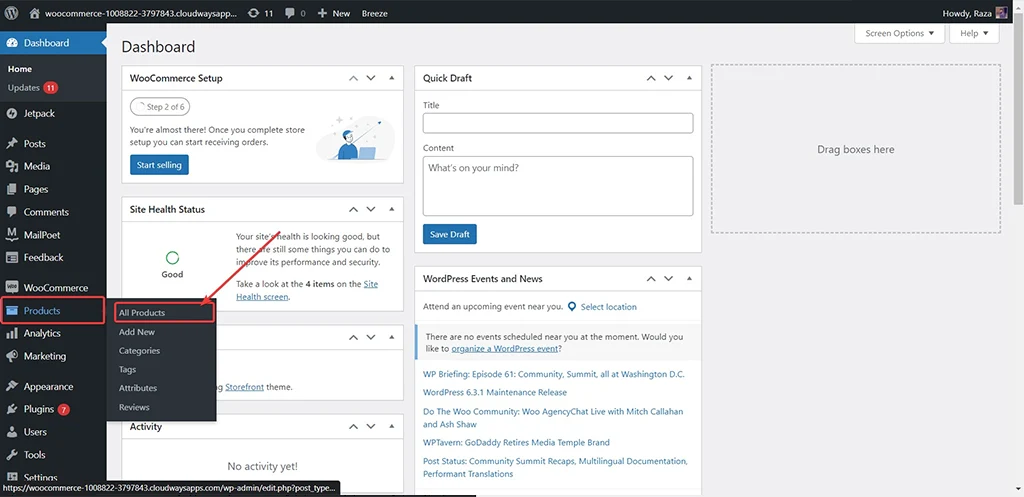
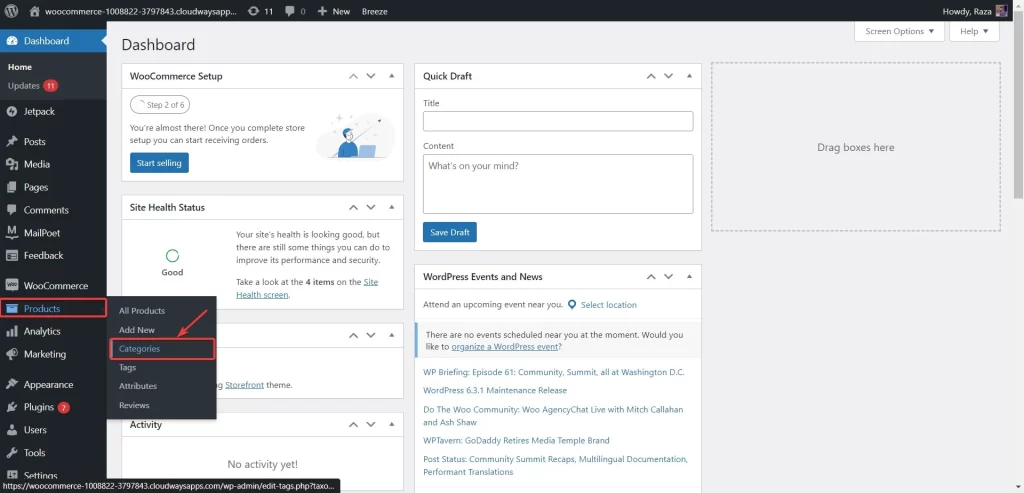
1.Head to Products > Categories on your WordPress Dashboard.
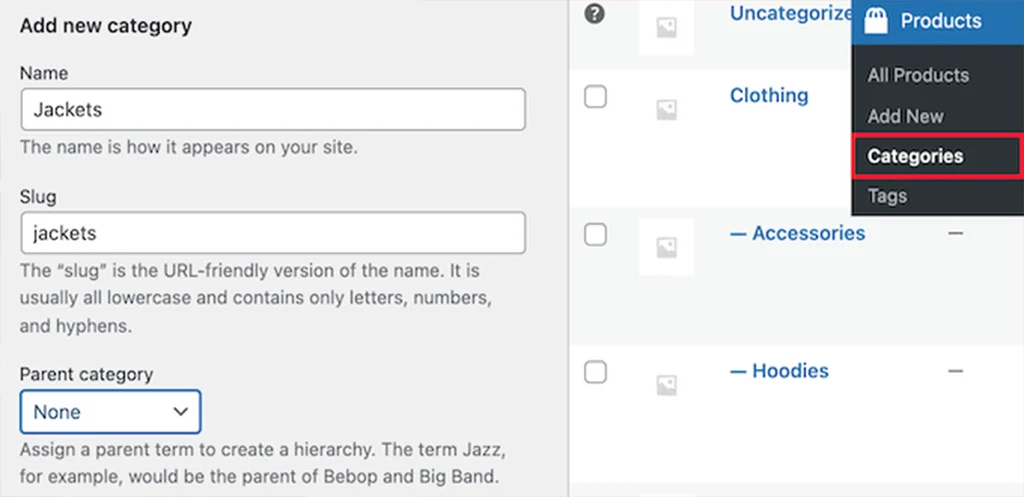
2.On the left side of the screen, you’ll see a window with prompts for setting up a new category. Give your category a name, slug, and description. You can also choose whether or not it has a parent category.
3.Next, choose a display type from the default dropdown for your category. This dictates what is shown on the category’s landing page. Your options here are “Standard,” “Products,” “Subcategories” or “Both.” As their titles imply, Standard uses your theme’s default. Subcategories display only subcategories. Products display only products. And Both will display subcategories and products.
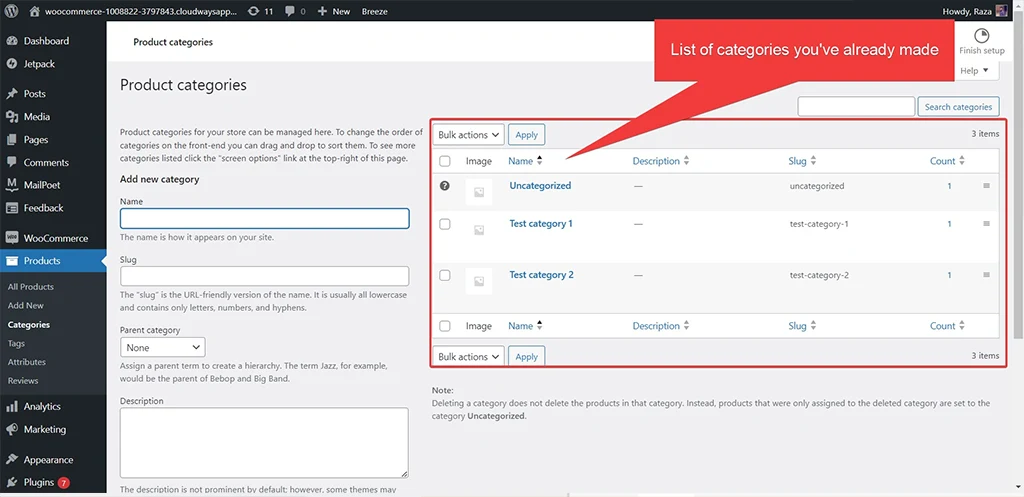
4.Once you’re done with the settings, click Add New Category, and you’ll see it listed on the right side of the screen along with all your other categories and the default “Uncategorized” category.
5.Now you can add your products and assign them to their appropriate categories.
6.After this, you can optionally add an image. Doing so is a good idea because several themes have pages where category images are displayed.
To add more categories, simply follow the above steps again.
Tags
To add product tags:
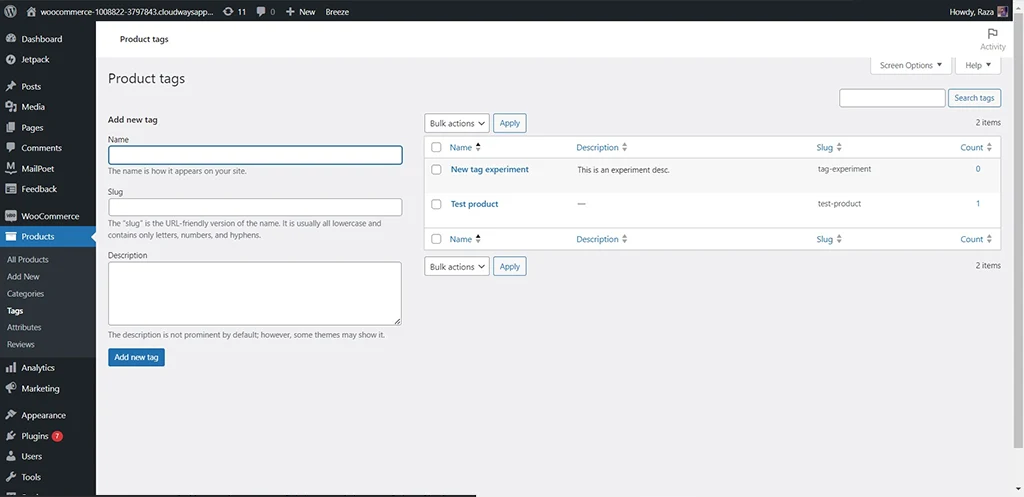
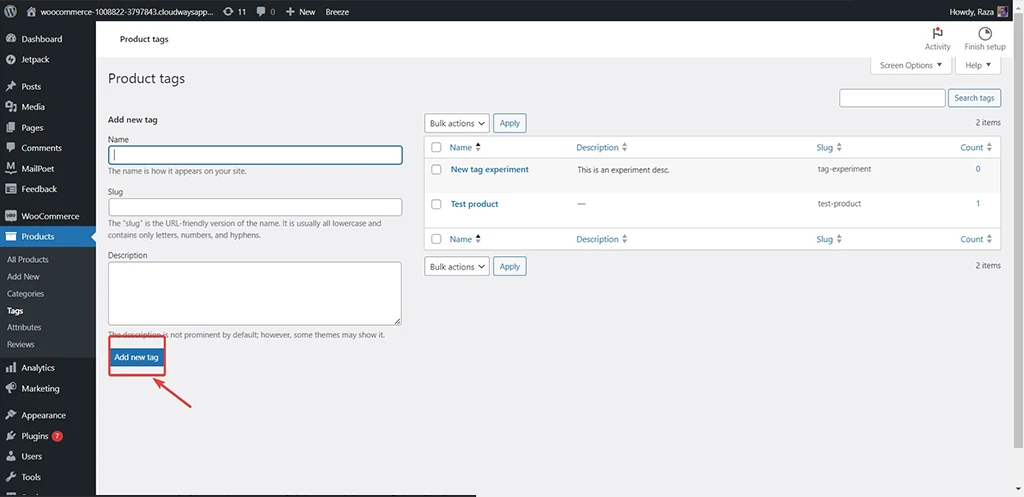
- Go to the WordPress dashboard and click Products then Tags. Just like product categories, you’ll see a window where you can set up your tags, add slugs, and even short descriptions. Once you’re done setting up, click add new tag to save the tag. If you want to edit previously added tags, you can also do so by navigating the left side of the window.
Before we go over setting up attributes let’s look at another way to add tags, which is by uploading new products to your WordPress store;
- Go to Product and Add New
- Insert your tag details in the appropriate boxes.
- Once you’re done with that, click Add New Tag on the left pane as shown in this example.
That’s it. You’re done. Your tags should appear like the example below but keep in mind this is just an example as the display ultimately depends on your store theme and design.
Pro tip? No, bombarding your products with hundreds of tags will not improve your store’s search visibility. It is good practice to limit tags to three per product but the nature and variations may call for more, so only go beyond that if it’s absolutely necessary.
Easier method to add categories and tags
Here’s another easy way to assign tags to your products.
If you already have categories and products set up, you can minimize the time it takes to pair them one by one and add tags with this method.
- Go to your WordPress dashboard.
- Click Products and All Products.
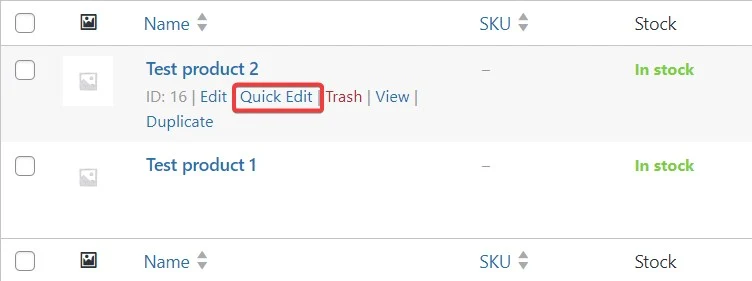
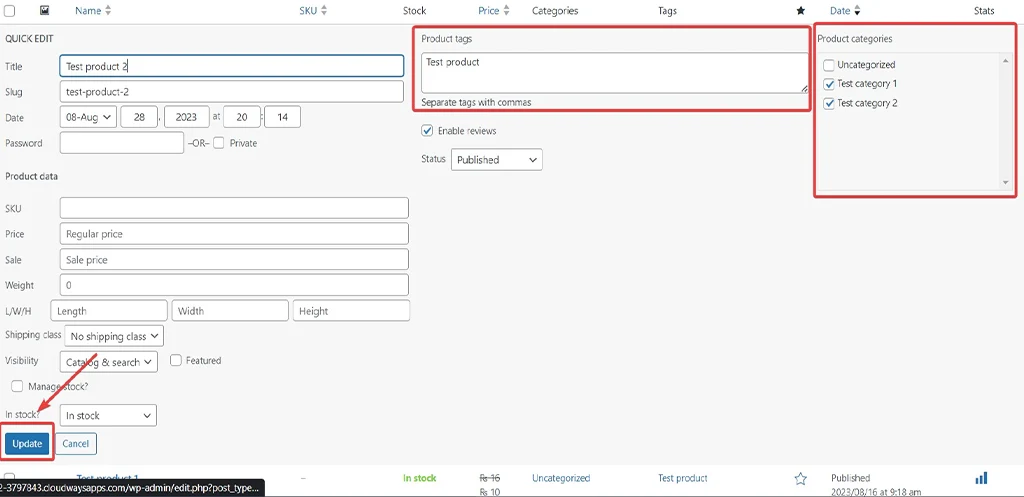
- Hover above the product you want to modify and click Quick Edit. Once you do that, you’ll see an interface to select both categories and tags for the products.
- Make the changes you want, then click Update. After this, you can visit the product page in your store to see if the changes reflected correctly.
With that, you’re done. You may consider using this method because it saves so much time compared to selecting products then adding categories one by one and tags one by one.
Attributes
To add attributes:
- From your WordPress dashboard, head to Products > Attributes.
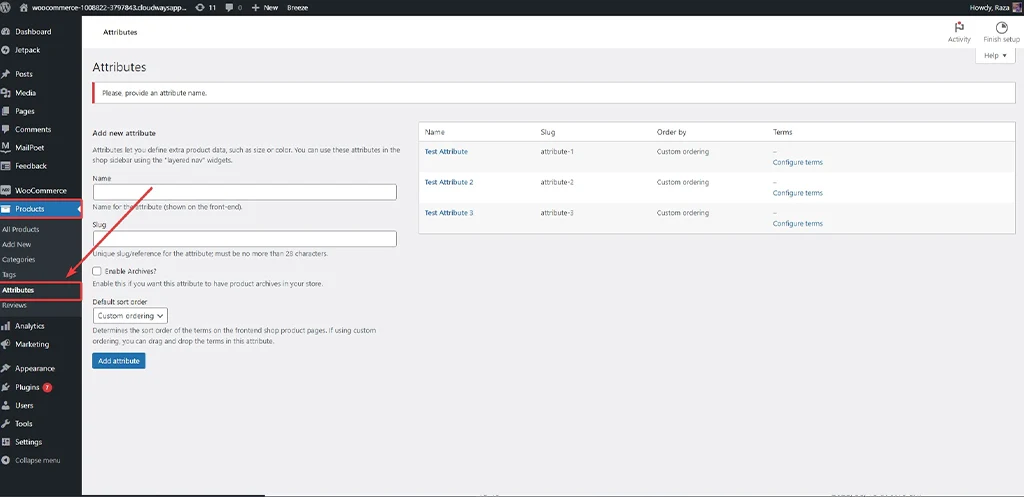
- Add a name and slug for the attribute. You can also enable archives by ticking the enable archives box. Basically, the Archives function allows you to display all products that share that attribute on a single page. Lastly, click Add Attribute too.
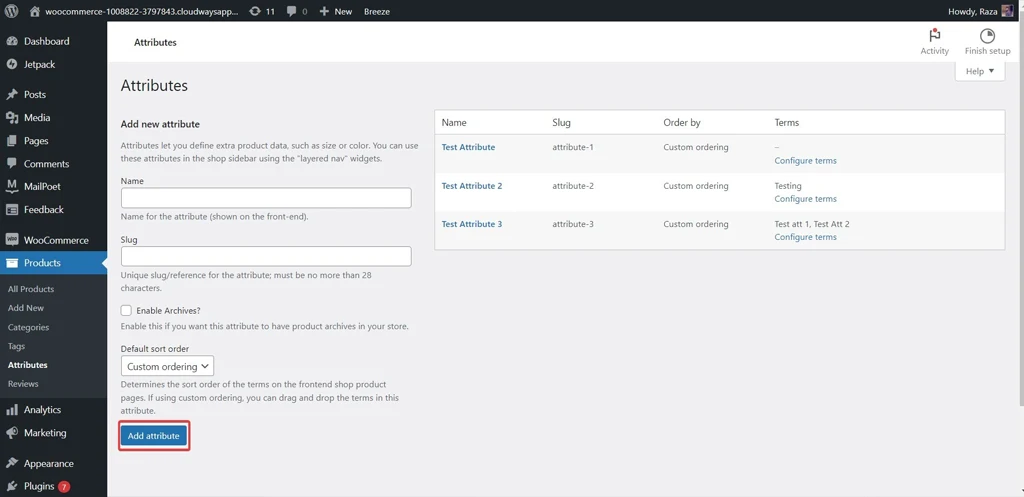
- After doing that, select a default sort order. This refers to the order your products will appear on the shop page for that attribute. Choose between “Name”, “Name (numeric)”, “Term ID” or “Custom ordering”. If you select “Name”, it sorts alphabetically with 1 and 10 preceding 2. If you select “Name (numeric)”, it sorts based on numerical value.
If you select “Term ID”, it sorts based on terms, and if you select “Custom ordering”, you decide by dragging and dropping the terms in the list when configuring the terms.
- Once done, click Save Attribute to save it to the attribute table.

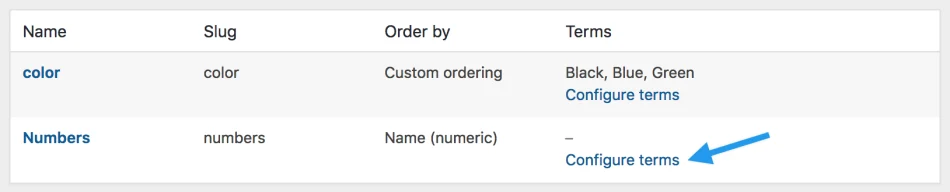
After adding the attribute, you need to add terms to the attribute. For example, if you created an attribute called Size, you would add the sizes you offer such as Small, Medium, Large, etc. To do so:
- Click Configure Terms and add your chosen terms. This process brings up a screen similar to the attribute configuration screen, where you’ll be prompted to add a name, slug, and optional description.
- Afterward, click the “Add new (Size, Color, etc)” button to save the attribute term you’ve just created. You can add as many attribute terms as you want by repeating this process.
Once done, it’s time to assign attributes to your products. Here’s how to do so:
- Open the product page belonging to the product you want to edit.
- Select the Attributes tab in the Product Data section under the text editor.
- Select your desired attribute in the custom product attribute dropdown.
- Click Add and repeat the process for any other relevant attribute.
- Once you’re done adding attributes, click the Select Attributes button.
- Finally, click Publish for new products or Update for previously added products to save your changes.
How to bulk add a tag to multiple WooCommerce products
What if you want to add one or more tags to multiple products at once? Surely manually adding them can be repetitive and too time-consuming. Luckily, you can save yourself the hassle by bulk adding one or more tags to several products. Here’s how:
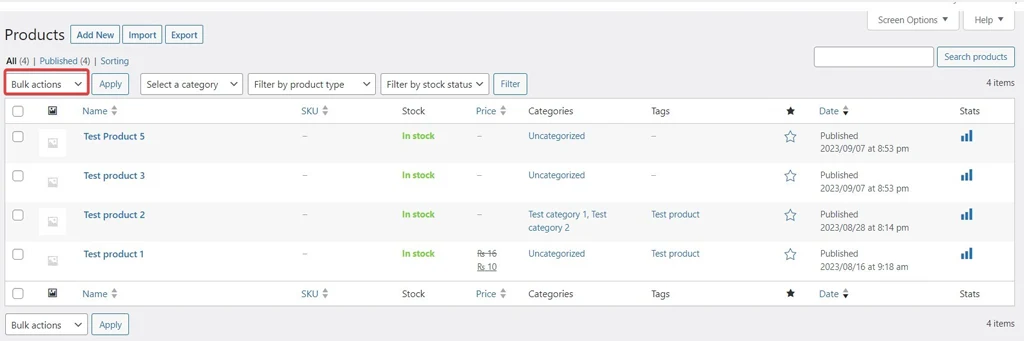
- Head to your WordPress dashboard and click Products.
- With your entire product list in view, click Bulk Actions.
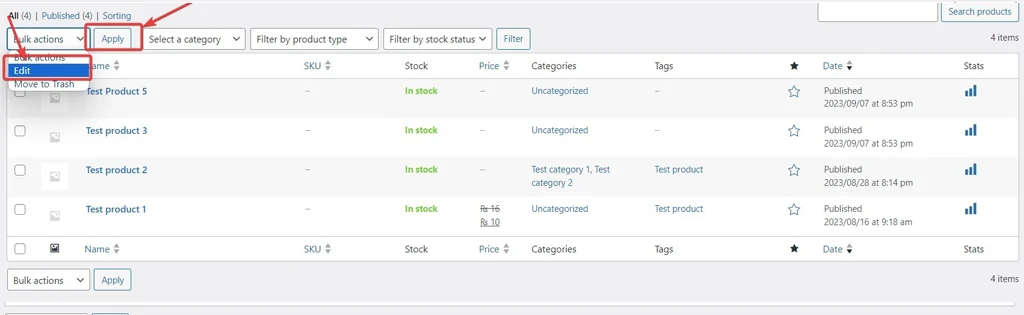
- Select Edit from the dropdown menu, then click Apply.
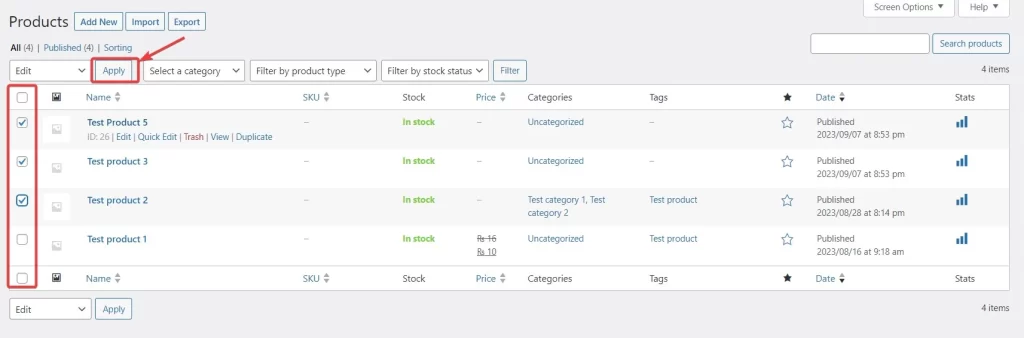
- Mark the checkboxes of all the products you want to add tags to, then click Apply.
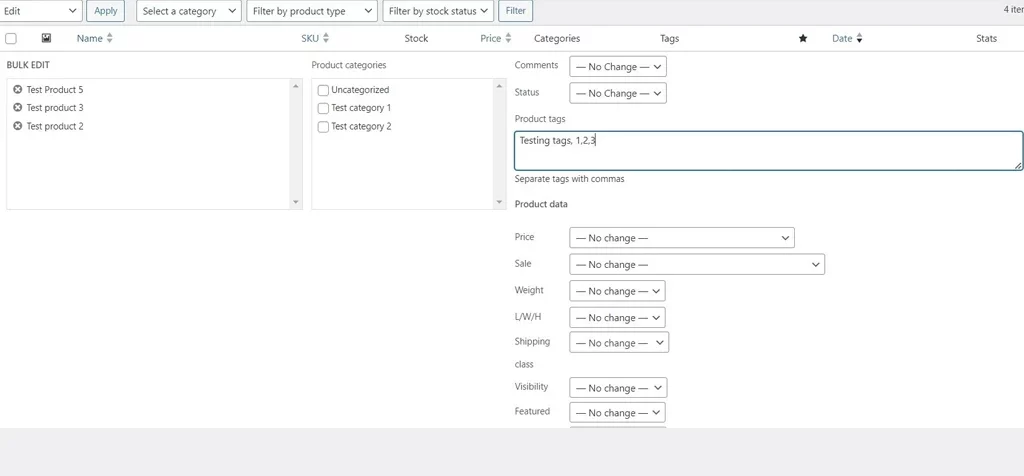
- A window will pop up. Once that happens, add your chosen tags, scroll down a bit, then click on Update.
How to check which products have categories and tags added
How to check which products have categories:
- From your WordPress dashboard, click Products.
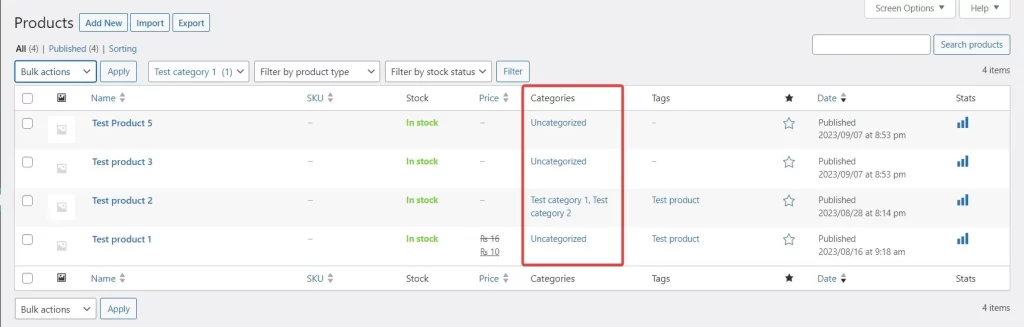
- Search for the Categories tab, under which you’ll see which product category each product is assigned to. By default, all products start under the Uncategorized tab, so that’s an indicator for items without a defined category.
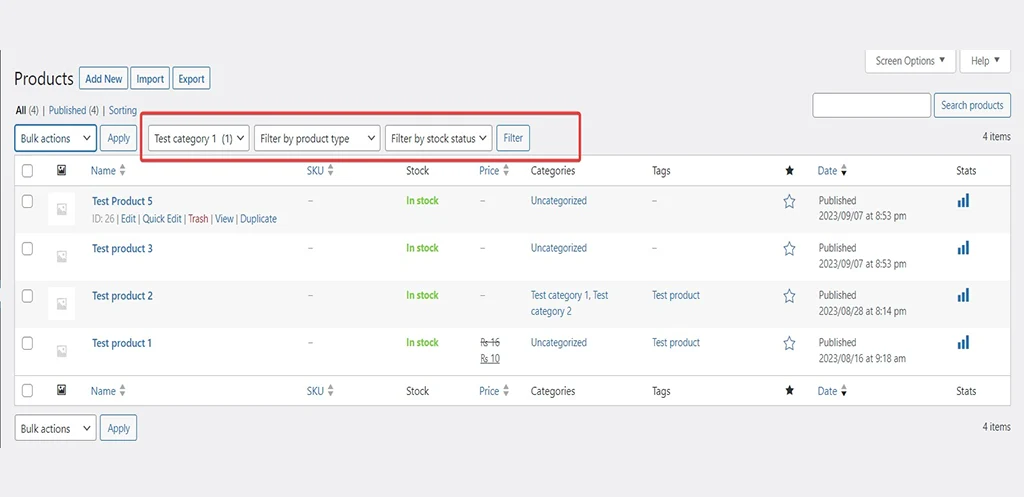
- To go further, if you want to see only the products in a certain category, you can use the dropdown filter buttons to specify a filter and display all the products in that category.
Additionally, if you want to see how many products are in a category, follow these steps:
- From your WordPress dashboard, click Products > Categories.
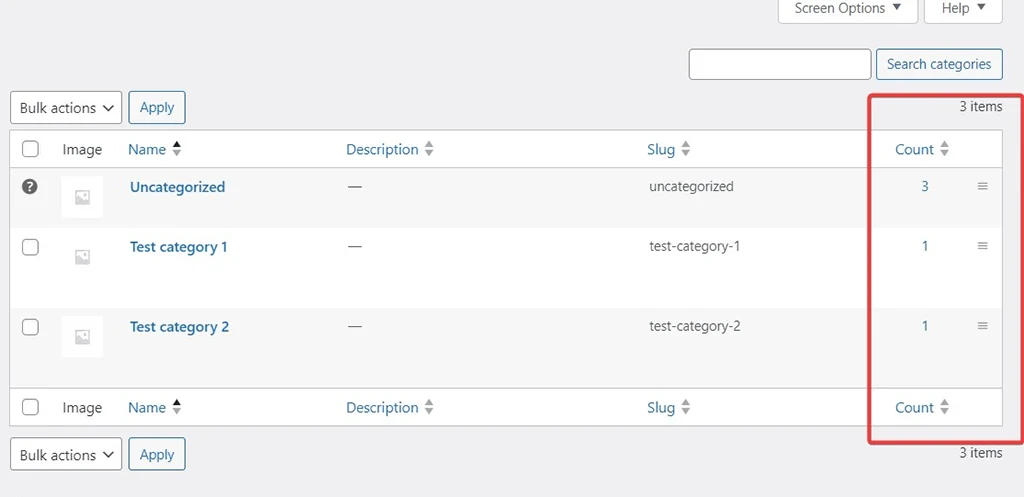
- Like in the image, you’ll see the arrangement of all your categories and how many products belong to each via the Count tab. Click on any of the numbers to display all the products present in that category.
How to check which products have tags:
Via all products:
- From your WordPress dashboard, select All Products.
- In the tags column, you’ll see all the tags you’ve assigned to a product.
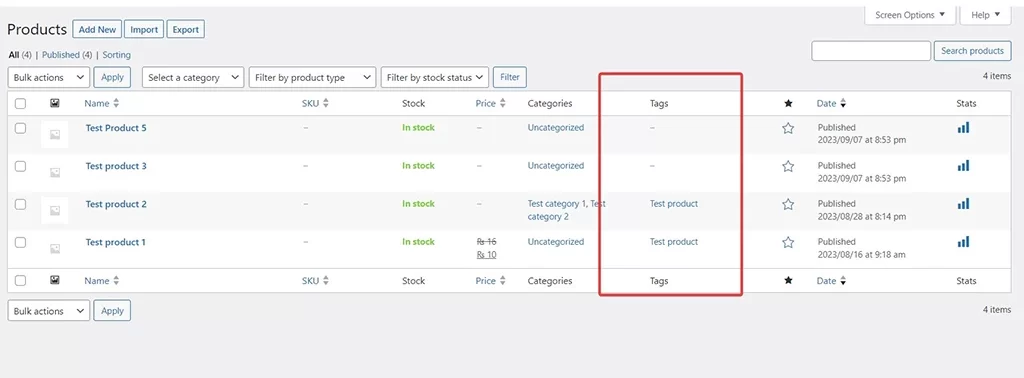
- Products without a tag will feature the “-” symbol to indicate their status. You can choose to highlight those products then assign the appropriate tags to them.
Via tags in product tab:
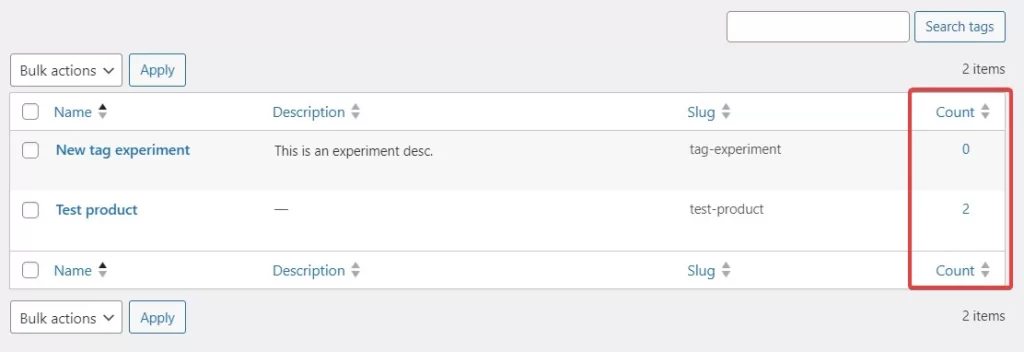
- – From your WordPress dashboard, select All Products.
- – Similar to categories, you’ll see how many products fall under a certain tag under the Count tab. You can also click on a tag’s number to see the associated products.
Final Thoughts
Optimizing your WooCommerce product labels is necessary if you want your store to grow, be discovered, and deliver a convenient user experience. Follow the methods we divulged today to sort and add the appropriate categories, tags, and attributes for your store products.


What a fantastic resource! The articles are meticulously crafted, offering a perfect balance of depth and accessibility. I always walk away having gained new understanding. My sincere appreciation to the team behind this outstanding website.