Online clothing stores are an attractive side hustle for 9-5ers, and entrepreneurs seeking profitable business opportunities.
On one hand, the accessibility and scalability of web stores allow you to reach people from all over the world without the constraints of a brick-and-mortar store.
And on the other hand, the constantly changing nature of fashion cultures favor innovation and imagination, enabling practically anyone to express their originality, capitalize on emerging trends and carve out unique brand identities for themselves.
However, the process of building an online store is terrifying to most people, especially those new to e-commerce. But if this sounds like you worry not.
Whether you’re driven by the desire to express your imaginations or the prospect of becoming financially independent as your own boss. This guide provides the tools and insights necessary to establish a thriving online clothing store with WooCommerce.
Let’s dive in!

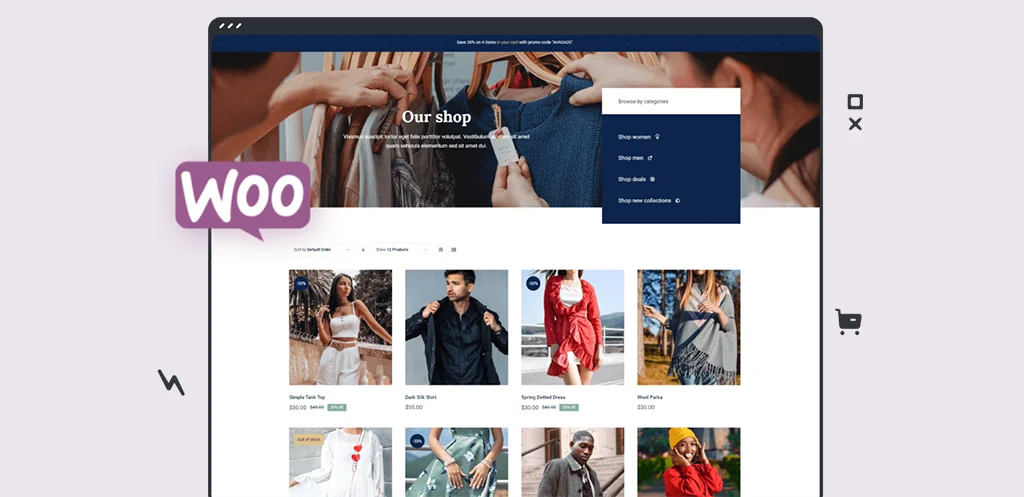
Why Should You Choose WooCommerce for Your Online Clothing Store?
Launching an online clothing shop requires the right e-commerce platform, and WooCommerce, which powers over 4,651,508 online stores, shines as a top option. Here’s why:
1.WooCommerce is an open-source and free to use solution, making it accessible to everyone.
2. WooCommerce’s interface allows for easy setup and management, making it ideal for beginners and seasoned users.
3. WooCommerce is built on top of WordPress, which gives you WordPress’s website building flexibility coupled with the freedom to sell any type of products you want
4. You can reflect your chosen brand identity and style due to its extensive customization options.
5. WooCommerce supports various payment gateways and shipping methods for customer convenience.
6. WooCommerce has built-in SEO features that help enhance visibility and rank on search engine results.
7. WooCommerce offers scalable solutions, ensuring users can expand their online stores as customer reach increases.
How to Start an Online Clothing Store with WooCommerce
Launching your online store with WooCommerce is easy when you stick to the following steps;
Step 1: Secure Your Domain Name
Getting started with your online clothing store begins with securing your domain name.
Now follow these steps:
1.Select a domain name that reflects your brand identity and resonates with your target audience.
2. Use a reputable domain registrar like GoDaddy, Bluehost, or NameCheap to check the availability of your chosen domain name. If it’s already taken, explore alternative options or consider tweaking your name slightly to find an available variation.
3. If your preferred domain name isn’t available with the traditional “.com” extension, there’s no need to panic. You can explore alternative top-level domain extensions like “.net” or “.org” that may better suit your brand or niche.
4. Once you’ve found the perfect domain name, register it along with your chosen extension through your domain registrar. Ensure you complete registration forms and payment processes to secure domain ownership.
5. After registering your domain, update your website’s DNS settings to point to your hosting server.
6. To safeguard your brand identity and prevent potential confusion or infringement, consider registering multiple domain extensions or variations of your domain name.
Step 2: Defining Your Clothing Niche

Choosing the right niche lays the foundation for your brand’s identity, positioning, and appeal to your target audience.
To choose the right niche, keep the following in mind
1.Study your target audience thoroughly. From their age to their gender, fashion preferences, where they shop, what they like and what they don’t like, etc, this information helps you create target customer profiles that practically guide you in knowing who you’re designing for.
2. Stay informed of the latest fashion trends. Doing so will help you identify gaps in the market and seize opportunities for growth and differentiation.
3. Thoroughly examine your competitors’ strategies to inform your approach. These include the product lines they offer, their pricing tiers and bulk purchase incentives, their marketing platforms, and the type of web content they create, etc.
4. Choose a niche that aligns with your interests, as it helps you stay motivated and authentically connect with your audience.
5. Define your unique selling proposition (USP). Find something that distinguishes your brand from others, for example, extra breathable fabrics, customizable sizing, quick deliveries, personalized customer service, etc.
6. To gauge customer response, gather feedback, and refine your product offerings, test the market with a small collection of products before going all in.
7. Read this resource on how to start a clothing brand.
Step 3: Establish Your WooCommerce Store
After successfully registering your domain name and selecting a clothing niche, the next step is setting up your WooCommerce store.
Various hosting platforms are available to accomplish this task, each offering unique features and benefits. Some popular options include Bluehost, Nexcess, Pressable, SiteGround, and more.
Take the following steps:
1.Begin by signing up for an account on your chosen hosting platform or logging in if you’re already a registered user.
2. Once logged in, navigate to the server management section and initiate the process to launch a new server dedicated to hosting your WooCommerce store.
3. During the server setup process, you’ll be prompted to select the software stack or application you wish to install. Choose WooCommerce from the available options.
4. Provide details like server size and location to tailor the setup according to your requirements.
5. After completing all required fields, review your selections and click the “Launch” button to initiate the setup process.
Step 4: Choose a Theme and Customize Your Store’s Design
When selecting a theme for your online clothing store, numerous options abound within the WordPress ecosystem, such as Astra, Divi, OceanWP, and Storefront.
The ideal theme for your store usually depends on your goals for its aesthetic and functionality. However, as you bring your vision to life, keep the following considerations in mind:
1.Ensure the theme seamlessly integrates with the WooCommerce plugin to support a smooth shopping process.
2. Look for features such as product pages, shopping carts, checkout pages, and payment gateway integrations to create a smooth transactional experience for your customers.
3. Choose a theme that is both attractive and professional. It also has to align with your brand’s style and reflect the brand identity you want to communicate.
4. Choose a theme with vast customization options, so you can tweak it to meet your changing brand needs and preferences later on.
5. Prioritize themes with robust support systems, such as user forums or dedicated customer support channels, to promptly address any queries or issues.
6. Prioritize feedback and adjust accordingly.
Follow these simple steps:
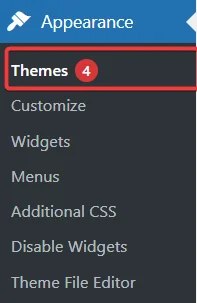
1.Log in to your WooCommerce Dashboard.
2.Navigate to Appearance > Themes.
3.Click on “Add New.”
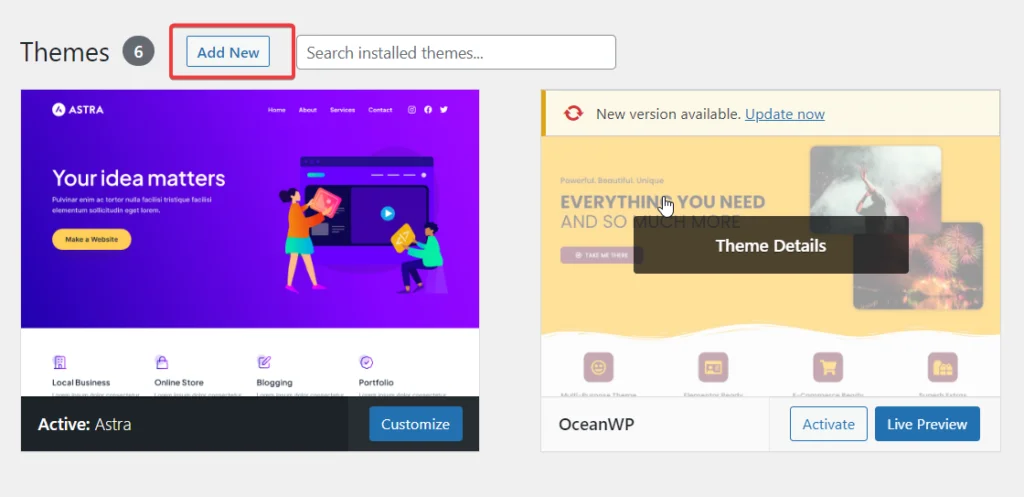
4.Search for your desired theme, then install and activate it.
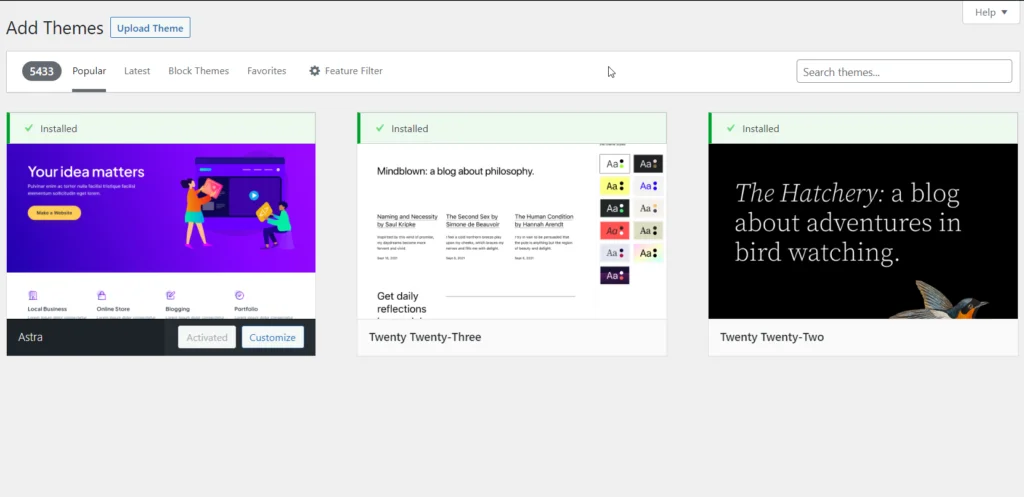
5.Once installed, you can customize the theme to suit your brand’s requirements and preferences.
Step 5: Establish Your Online Boutique Store Pages
There are certain pages that your online clothing shop must include. These key website pages make your site more complete, functional, and user-friendly, thereby allowing customers to navigate your store and complete purchases easily.
Here’s an overview of the essential pages and what to include:
Homepage:
This is the main page visitors see when they visit your website. So it’s your first opportunity to welcome a visitor and provide information about what they can find on your site. Here, you may showcase your brand message, top product, or links to product collections.
Shop/Products:
Here’s where you display all the products you have available. You can make it easier for customers to find products by adding filters such as color, size, or style.
About Us:
This page should feature your brand’s story, mission statement, and values.
Contact Us:
Here, provide essential contact information, including phone number, email, and physical addresses, allowing customers to reach out with inquiries or concerns.
Blog:
Feature blog posts covering product highlights, industry trends, and other topics of interest to enhance engagement and provide valuable content.
FAQ:
Here answer the questions your customers ask all the time about products, shipping returns, etc.
Collections
For easy navigation, separate clothes based on categories like gender, season, style, and more.
Policies
Offer detailed information on shipping rates, estimated delivery times, and return policies to set clear customer expectations regarding their purchases. Furthermore, explain how you use customers’ data.
Lookbook
Show alternative ways to style your clothing and feature real-life people or customers rocking your outfits. Knowing how your products can be styled in various ways makes it easier for shoppers to make the purchase.
Fit/Size Guide
Explain how items fit i.e. true to size etc, how customers can measure themselves, and the measurements of your clothing.
To create pages on your store, follow the following steps;
A.Navigate to your WordPress Dashboard.
B.Click on “Pages” and then “Add New.”
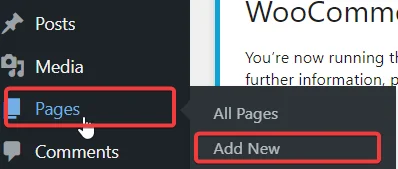
C.Customize your page settings to align with your brand’s aesthetic and messaging.
Step 6: Fill Your Online Clothing Store with Products
With your essential store pages in place, the best part of building your store is next – adding your products.
Consider the following to ensure you meet customer expectations.
1. Get the best clothing items that reflect the quality and craftsmanship standards of your brand. Remember, quality builds trust.
2. Offer a range of styles, sizes, and colors to cater to the diverse tastes of your shoppers.
3. While you want to turn impressive profits, remember to set fair and competitive prices based on quality
4. Craft emotional and relatable product descriptions – show the customer the benefits of their choice, and make them informative and engaging. Also, highlight all the customer needs to make an informed decision.
5. Visuals are vital. They feed the imagination of your customers and let them envision how the clothes would look on them from different angles and in other contexts. Hire experts for your product photography if you need to.
6. Simplify the browsing experience by organizing products into clear categories and implementing effective filtering options.
7. Encourage customers to leave reviews and leverage social proof to instill confidence and drive conversions.
8. Prevent stockouts and backorders by maintaining accurate inventory management.
9. Use a reliable partner for your shipping and order fulfillment needs to ensure customer satisfaction.
10. Let your customers know you’re dedicated to their peace of mind by establishing a transparent and hassle-free returns policy.
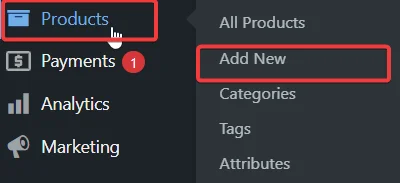
Now, let’s explore the step-by-step process of adding products to your WooCommerce store:
A. Log in to the WordPress dashboard, and select the WooCommerce menu.
B. Click on “Products” and then “Add New.”
C. Enter the product name and description in the text editor.
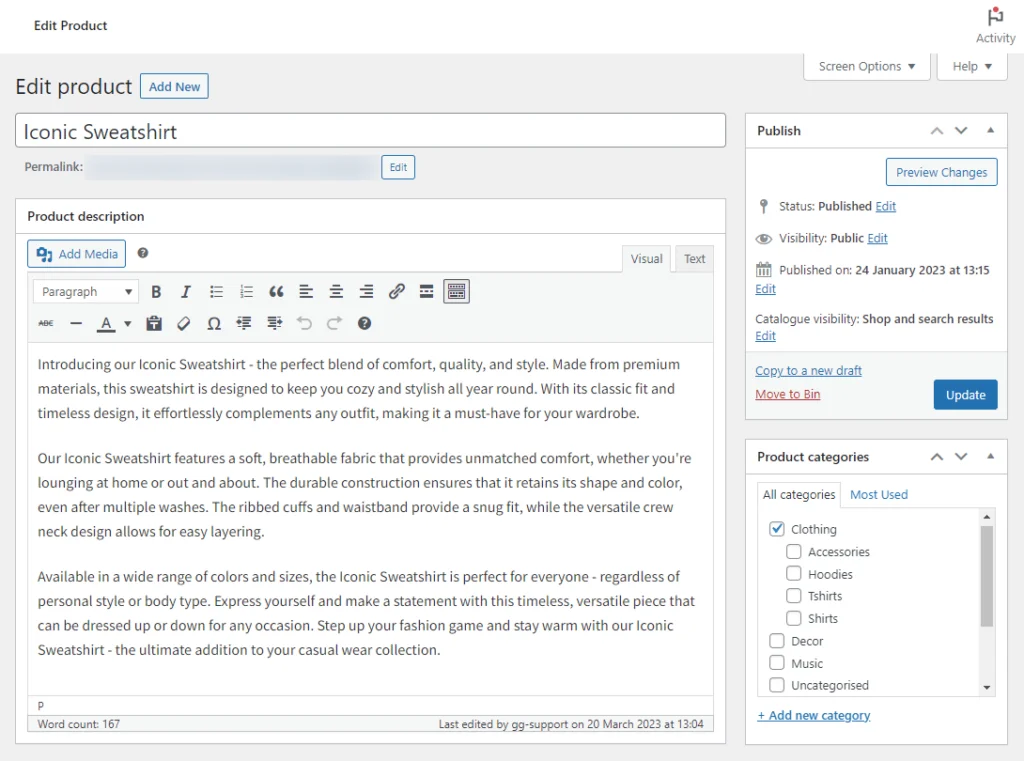
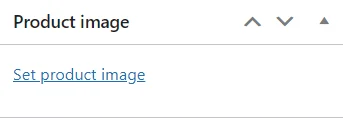
D. Insert product images by clicking on the “Set Product Image” link.
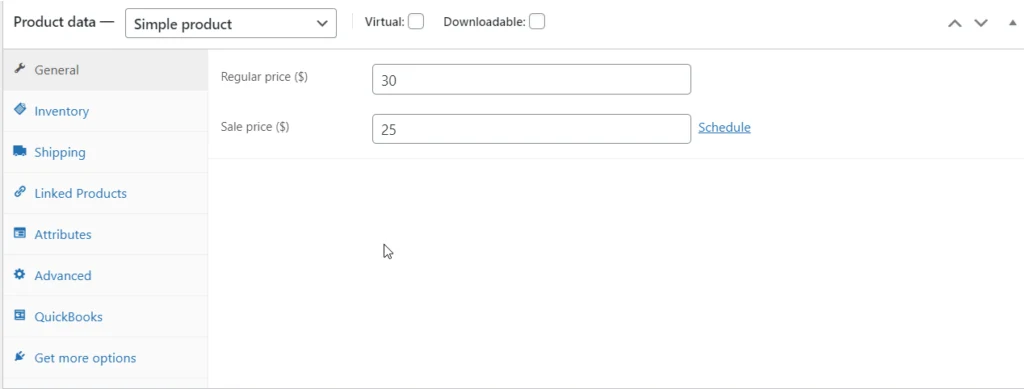
E. Input the product price and other product details, such as SKU, inventory, and shipping information.
F. Use high-quality images representing your products, ensuring consistency with your brand aesthetic.

G. Assign relevant categories and tags to organize your products and make them easy to find.
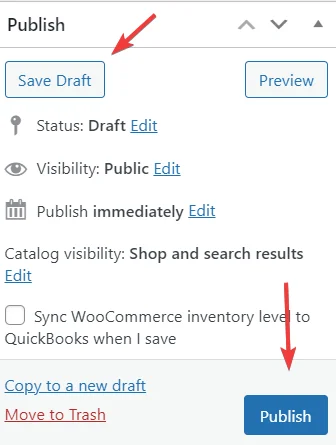
H. Save the product as a draft for further review or publish it to make it available for purchase by your customers.
I. Preview your product listing to verify accuracy and visual appeal before publishing it on your store.
Step 7: Establish Payment Systems and Test the Shopping Experience
Your customer needs to have a reliable payment process. A repeat purchase is unlikely if they have to go through numerous hassles before making a payment.
Additionally, offering multiple payment options caters to different customer preferences, ultimately increasing sales.
Consider transaction fees, security measures, and customer convenience when selecting payment methods.
Here are some popular payment options:
- Credit and Debit Cards
- PayPal
- Bank Transfers
- Mobile Wallets like Apple pay and Google pay
- Cash on Delivery (COD)
To integrate these payment methods into your WooCommerce store, follow these steps:
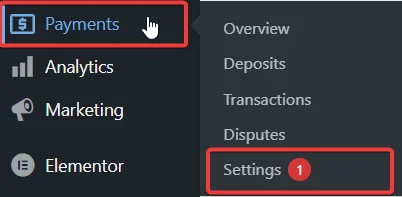
A. Log in to your WooCommerce dashboard.
B. Navigate to Payments > Settings.
C. Access the “Payments” tab to view available options.
D. Click on “Set up” for the desired payment method.
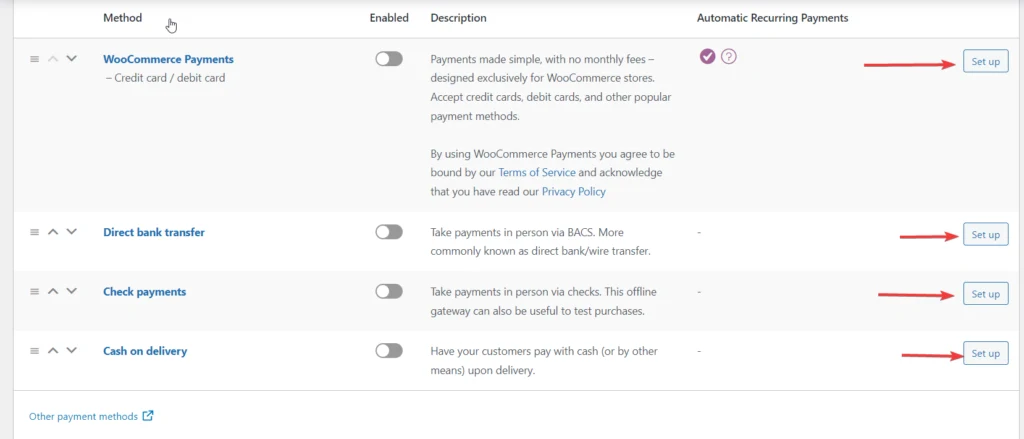
E. Configure the payment gateway settings, including account details and security measures.
F. Save the changes to activate the payment method.
G. Ensure a smooth checkout experience by testing each payment option.
How to Boost Your Online Clothing Store
Your online clothing store is now fully set up on WooCommerce! However, you need intense marketing to ensure customers can find your store.
The following tips will help you generate your target traffic.
1.Use platforms like Instagram, Facebook, Twitter, and Pinterest to showcase your collection. Study the preferences of users’ on each platform to know how to appeal best to these customers.
2.Curate an email list and consistently launch email campaigns to engage customers and encourage repeat purchases.
3.Strategically optimize your website with relevant keywords and quality backlinks to improve search engine visibility.
4.Use platforms like Google Ads and Facebook Ads to target potential customers and drive traffic to your store. You can also use influencers to reach your target audience.
5.Collaborate with other businesses, bloggers, and influencers to expand your reach and attract new customers.
6.Network! Show up at industry events and trade shows to showcase your collection. Attend industry events and trade shows to showcase your collection and network with potential customers.
7.Follow this guide to increase online store sales.
Final Thoughts
The idea of running an apparel business online can be daunting. However, by following the tips in this guide, you can build an ecommerce shop that caters to your audience’s needs and stands out in a highly competitive marketplace.
As you build and grow, remember to work on your business every day, track your mistakes and progress, and follow the best practices we lay out here and in our blog every week.