It is without a doubt that we cannot survive without physical stores and shops. They are a major part of any city’s or community’s economy. But, it is also important to accept that as the world gets older, technology evolves.
As a smart business person, adapting to this technological evolution is necessary if you want to stay relevant and grow your business.
Taking your business online is a great way to adapt to technological evolution. This means having a website that acts as a store where people across the world can purchase items from. A website can do a lot in boosting your business’ reach a lot.
Launching a website might at first sound super hard but all you need is a plan, and some know-how, and boom, you are up and running with an online store.
I will be giving you 7 steps you can follow to launch an online store that is headed for success.

7 Steps to Take Your Brick And Mortar Business Online
Step 1: Do Your Research
Since you already have a physical business, the concept of market and customer research will definitely not sound alien to you. You might have even conducted extensive research before starting the physical store.
However, starting an online business is an entirely different ball game, especially if you are targeting an international audience, and require some further research. Some things you need to research are:
- Find out how viable your business will be online: Before going online, find out if there is an audience for it online based on your goals.
Check out the market size and see if there’s enough room for your business or if it is saturated. Don’t just check if you can set up within that market, also make sure it is possible to grow the business.
Also, conduct product research. Ensure your business is capable of competing with other online businesses in the same market category.
- Organise how your inventory management will look: Moving your physical business to the online world can open several opportunities for growth, but it does come with its own set of challenges one of which is managing inventory.
While using normal spreadsheets like Excel for inventory may have worked well in your physical store, doing the exact same thing online can hinder your ability to scale for the following reasons:
Higher stocking costs: You may have to invest more in maintaining a larger inventory and warehousing to meet the increased online demand from customers.
Increased risk: Your business becomes more vulnerable to unexpected changes in demand and market fluctuations, leading to potential issues like overstocking or selling products without enough inventory to fulfill orders.
More operational complexity: Managing inventory becomes more complicated as online demand rises. Without proper preparation, you might find yourself improvising solutions and end up with a mix of inventory management tools that don’t work seamlessly together.
So, it’s really important to rethink how you handle your stock. One option is to consider dropshipping to reduce the problems from earlier.
You might also want to improve your current inventory management techniques and use something like Six Sigma. This method can help you optimize how you handle your inventory.
To make things easier, platforms like Shopify have built-in tools that automatically track your current stock and orders.
You can also use inventory management plugins to integrate with your store, reducing waste, storage costs, and unsold items, ultimately improving your cash flow.
- What will your pricing look like: Chances are, you already have a system for setting prices for your brick-and-mortar store. But, now that you’re expanding online, you will need to think about whether your pricing plan needs to change.
Let us say: If you used a cost-plus pricing method for your physical business, does it still make sense for online sales? The online competition may be different, so you might have to think about a strategy where you offer lower prices than your online rivals.
On the other hand, going online might introduce you to a new group of customers. This could be a chance to make more money by adjusting your prices based on the unique value your products bring to these new online shoppers.
Step 2: Selecting The Right Platform
In the past, building a website required you to know a lot of coding. However, in today’s world, it’s become way more user-friendly.
You don’t necessarily have to be an expert in HTML and CSS to construct a site. (Though having a basic understanding of HTML can be helpful, usually, just the basics will do.)
A lot of websites are built using a CMS (Content Management System). This is a software platform that allows you to construct a website without delving into the code. The software manages the code in the background.
You can create pages for your site and add content to them through a user-friendly interface of drag and drop.
Before I show you how to bring your regular store online, let’s talk about the two types of platforms.
1.Hosted
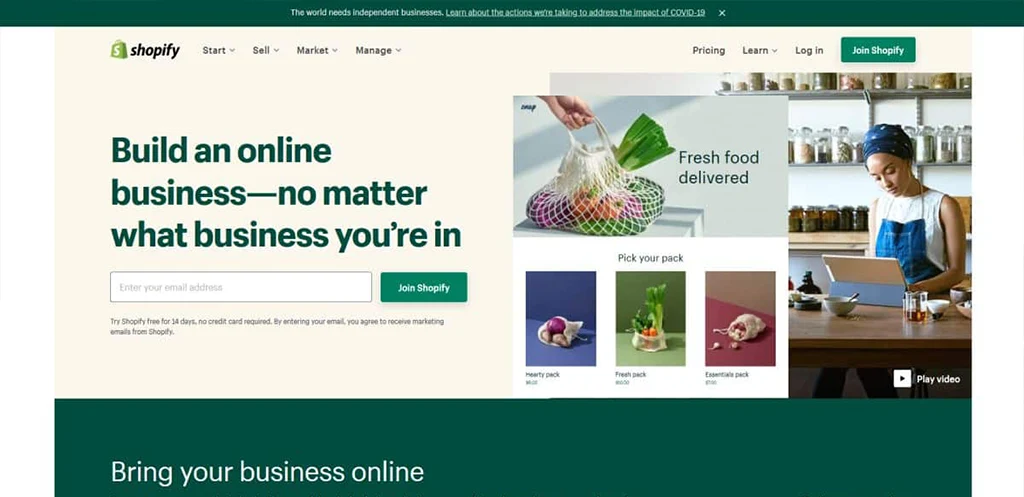
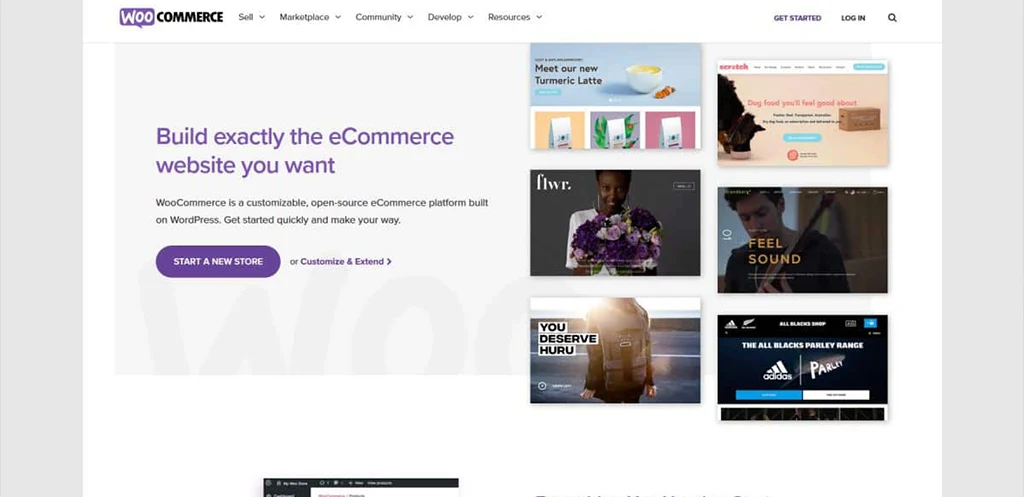
Platforms like Shopify and Wix include hosting. In such platforms, you create a profile on their website and they take care of everything so you don’t have to worry much with the creation of your e-store.
These platforms are easy to use and don’t require any technical skills from your side.
The drawback of using such a platform is the cost and the freedom to do anything you imagine.
This means that, if your online business starts growing, your demands might also grow. So, eventually, you might need something more advanced. And moving your e-store to another platform isn’t that easy.
Examples are:
Shopify
Shift4Shop

WooComerce
2.Self-hosted
Opting for the self-hosted approach means you’re the boss! You get to customize your online store however you want, tinker with your website’s code, and decide when to make updates.
However, if something goes wrong, you’re the one who needs to fix it. The ease of drag-and-drop isn’t typically available here, so setting up your website might take a bit longer.
Once you’ve picked your eCommerce software, you’re all set to keep building your website. The specific steps may vary based on your chosen platform, but the next actions are the same regardless.
Step 3: Register a domain & Build Your Website
A domain name is like your website’s address on the internet – it’s what users type in their browsers to visit your site.
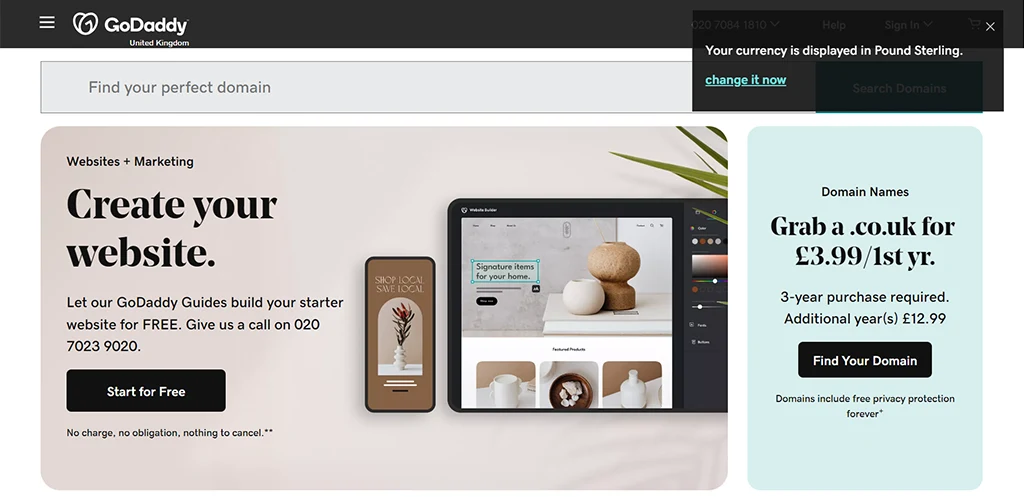
In this guide, I’ll be registering a domain through the well-known platform GoDaddy.com. Now, let’s walk through the step-by-step process:
- Go to the homepage.
- Enter your desired domain name in the provided space.
- Click on the “Search” button.
If the domain name you entered isn’t available, you’ll be prompted to search for a new one or choose a different variation.
GoDaddy’s suggestion tool will provide alternative ideas, including different extensions or variations for you to consider.
If your chosen domain name is available, you’ll see the option to add it to your cart, along with the various prices for each extension.
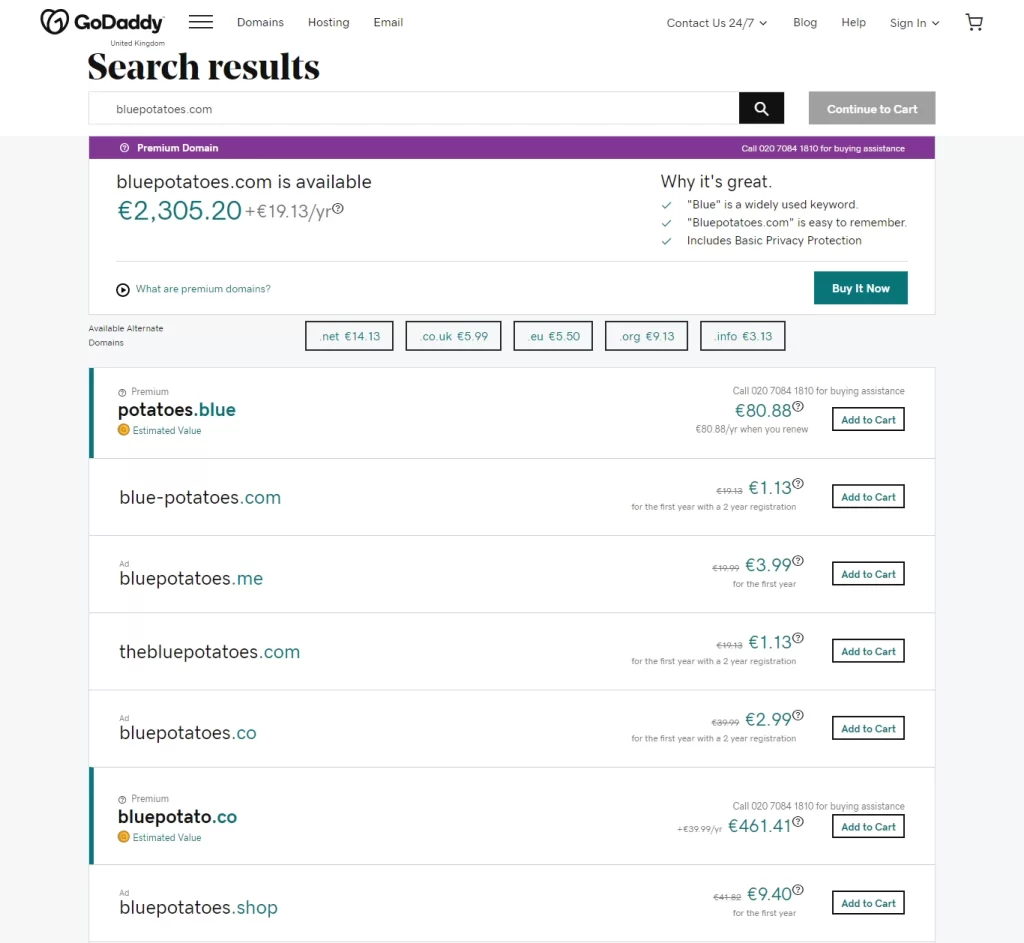
Once you’ve picked your preferred domain, click on “Add to Cart,” and then proceed to “Continue to Cart.”
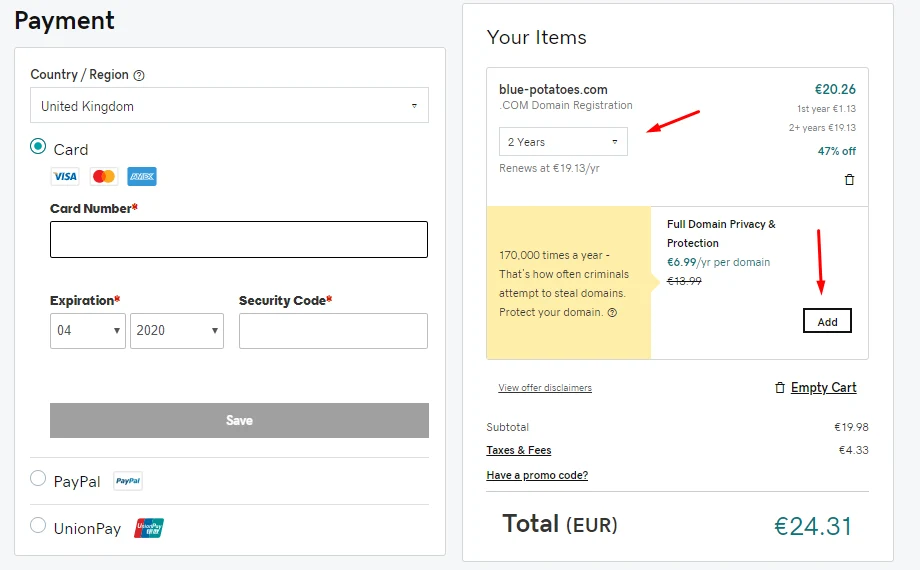
At this point, you’ll be prompted to either create a new account or sign in if you already have a registered account on Godaddy.com.
After completing the sign-in or account creation, fill in your billing information and click “Save.” Following that, input your payment details. Before finalizing your purchase, you’ll see a summary of the domain and preferences you’ve selected.
At this stage, you have the option to adjust the duration for which you want to purchase the domain or add full domain privacy and protection if desired. The price will update automatically based on your choices.
The next step is designing your site
If you choose a hosted service like Shopify or WooCommerce:
Opt for a simple, professionally designed theme and add customizations gradually if needed. It’s essential to ensure the design not only reflects your brand’s personality but also provides an easy navigation experience for customers.
With pre-made themes, you can make several changes to ensure your website mirrors your brand image. Most templates allow you to:
- Replace the default logo with your own.
- Adjust the background, font, and navigation menu.
- Edit or remove content from different pages of the site.
- Add social media links in the header and footer.
- Include an email sign-up form or link.
- Showcase product videos and images.
The flexibility of these customizations may vary across platforms, with solutions like Shopify allowing sellers to infuse their brand’s personality into their websites.
But, if you choose to build and self-host your website yourself, you will need to register for a hosting platform like Hostinger and use either a Content Management System like Wix.com or WordPress or, hire a web developer to build one for you.
Step 4: Setup The Store To Be E-commerce Ready
The aim of bringing your business online is to do business there. This includes making it easy for customers to find you, pay for your products or services, and ensure you can fulfill their orders.
Optimize for Search Engines
After building your website, you would want it to show up when people search for items related to your store on Google. Use good practices for search engine optimization to make your store rank higher in search results and attract more visitors.
Create a Google Business Page
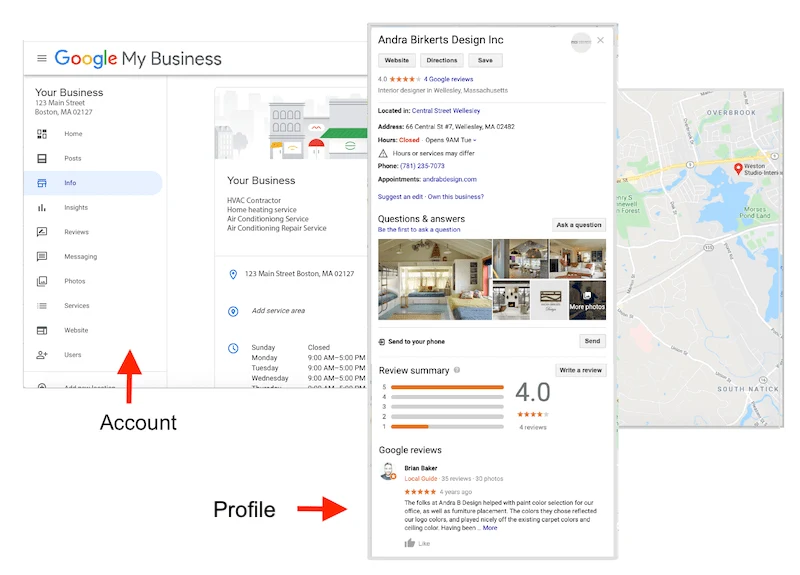
Aside from having your website appear when people Google your business name, they should also find a Google My Business page.
This is crucial to boost your online presence and strengthen connections with existing customers. You can also link it to your online store. Plus, it helps potential employees, investors, and the media discover your business.
Connect your website with your physical store’s processes
Now, you need to think about connecting your online store with the behind-the-scenes stuff in your physical business like accounting, marketing, sales, manufacturing, logistics, and more.
You can explore apps that automate tasks and seamlessly fit into your business. This brings together various essential workflows and processes into one system, ensuring a streamlined and efficient overall operation.
Managing the shipping & fulfillment logistics
To reach more places with your business, you need to handle getting your products to customers. This might involve delivering locally or shipping to different states and countries. Wherever your business grows, you’ll need a shipping and fulfillment plan.
I would recommend you check out Globallyfulfill for your shipping & fulfillment logistics. They are a Chinese company that handles the storage and delivery of apparel and other clothing-related clothing items for online stores.
They handle everything from dropshipping to just serving as a third-party logistics service provider.
Here’s their service webpage, check them out.
Step 5:Setup All Required Legalities
Moving your business online doesn’t mean you can skip regular legal steps. In fact, depending on how you run things, you might have a few more requirements to meet.
Here are some important legal aspects to consider when selling products and services on the Internet.
- Business License
For an online business, you typically don’t need a separate license. You can use the same one you got when registering your physical store or LLC. However, if you’re running the business from home, you might need a Home Occupation Permit.
If you are from the United States, check the SBA’s list of state licenses and permits to find the right one for your location. If not, just research state licenses and permits in your country.
- DBA License
If your online business is using a name different from your regular company, you’ll need a DBA (Doing Business As) license. You can apply for a DBA with your state government, considering the location where your business is incorporated.
Not all states make you get a DBA license, but make sure to check your state’s rules before using a made-up name for your business.
- Tax Obligations
You should register for an EIN (employee identification number) to ensure the IRS can properly tax your transactions. Also, if you’re selling goods or services in a sales/use tax state, you might need to collect sales tax.
- Data Privacy:
If your business gathers customer information, you must have a privacy policy explaining how you handle that information.
Additionally, you might need to follow GDPR laws, which requires you to add a disclaimer on your website that you are collecting your customer’s personal information.
Step 6: Upload Your Products and More Information
Your website serves as more than just an online store; it’s your presence on the internet. Customers seek information from your site, whether or not they plan to make online purchases.
Certain information is necessary for your site to function, some is required by law in specific areas, and other details, though optional, can enhance customer trust in your business.
- Business Address: Include your location(s), and if applicable, add multiple addresses such as other locations or a different shipping address.
- About Us Page: Customers may want to know about your business. An About Us page is often a go-to for online shoppers deciding whether to trust a website. A well-crafted About Us page can influence customer trust and even drive them to your physical store.
- Policy Pages: Essential pages for privacy, shipping, and return policies. Consider consolidating short policies on one page or separating longer ones based on their content.
Policies not only streamline customer service but can also be a legal requirement. Seek online resources for guidance on setting up your return process.
- Other Information: If you wish to add more pages for additional information, such as customer guides or manufacturer details, now is the time.
Having more content available at launch is beneficial. However, avoid unnecessary clutter; only add what is essential for a clear and concise website.
- Product or Service Page: This is where you provide details about the products or services you offer.
Break down features, benefits, and any other information into short, easy-to-understand sections. Enhance readability by using subheadings, bullets, and visuals.
You can capture high-quality images of your products with your smartphone. You could also consider hiring a photographer for a lifestyle shoot to showcase on your website.
Step 7: Inform Your Customers Of Your Move
Taking your business online is one thing, but making people notice it is another challenge. Standing out from competitors with similar offerings is tough. After going online, make sure to promote your business actively. Here are some channels you can use:
Send a simple, non-spammy email to your existing customers and those on your list. Keep it informative, as including promotions may prevent the email from reaching their primary inbox.
- Social Media
Make an announcement post on platforms like Facebook, Instagram, Pinterest, LinkedIn, etc., where your business has a social presence.
Include a link back to your website to attract attention to your new online identity. Tailor your content to each platform for maximum impact.
- Influencers
Partner with influencers to spread the word about your business. Start with smaller influencers, as they tend to be more effective in engaging and influencing their audience. Influencer referrals can even bring new customers to your business.
Conclusion
As you go through the article, you’ll notice that it’s equipped with everything you need to transition your brick-and-mortar store into the online space.
And it truly does! Simply follow the steps, one at a time, and you’ll realize how straightforward it is to introduce your brand to the eCommerce world.


1 thought on “7 Steps to Take Your Brick And Mortar Business Online”
You’re so awesome! I don’t believe I have read a single thing like that before. So great to find someone with some original thoughts on this topic. Really.. thank you for starting this up. This website is something that is needed on the internet, someone with a little originality!